
Halloween is a special time for Disney theme parks. I haven't had the chance to experience it myself, but I've heard rave reviews from others who have. I'll be joining their ranks next September. In the meantime, I keep up on what's new and I was excited to learn Jack Skellington and his love, Sally, will be appearing at Magic Kingdom Park at Disney World this year for Mickey's Not So Scary Halloween Party. What's a Disney Halloween without our favorite Nightmare Before Christmas characters?
My daughter and her fiancé, who will be her husband by the time we take our trip, are trying to gather enough Disney shirts that they can match every day we're in the parks. I decided they needed to add Jack and Sally to their collection.

We'll start with Jack. To make this reverse appliqué shirt, you'll need this pattern, a white t-shirt, black fabric, black and white craft thread (also known as embroidery floss) and iron-on interfacing.
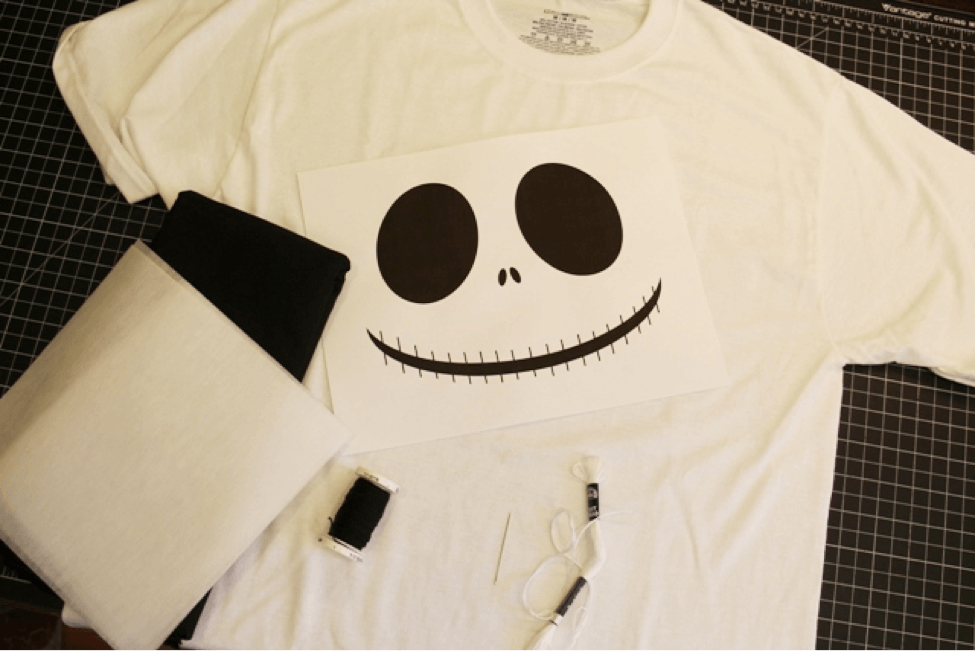
Trace the eyes, nose and mouth onto the non-fusible side of the interfacing. Cut out, leaving about 1/2" around the shapes. Iron onto the back of the black fabric. Cut the pieces out loosely around the interfacing. Turn the t-shirt inside out. Using the pattern as a guide, pin the pieces in place onto the shirt. It helps if you slide a piece of cardboard or something else flat and stiff inside the shirt so you aren't pinning through the back. Pin generously.
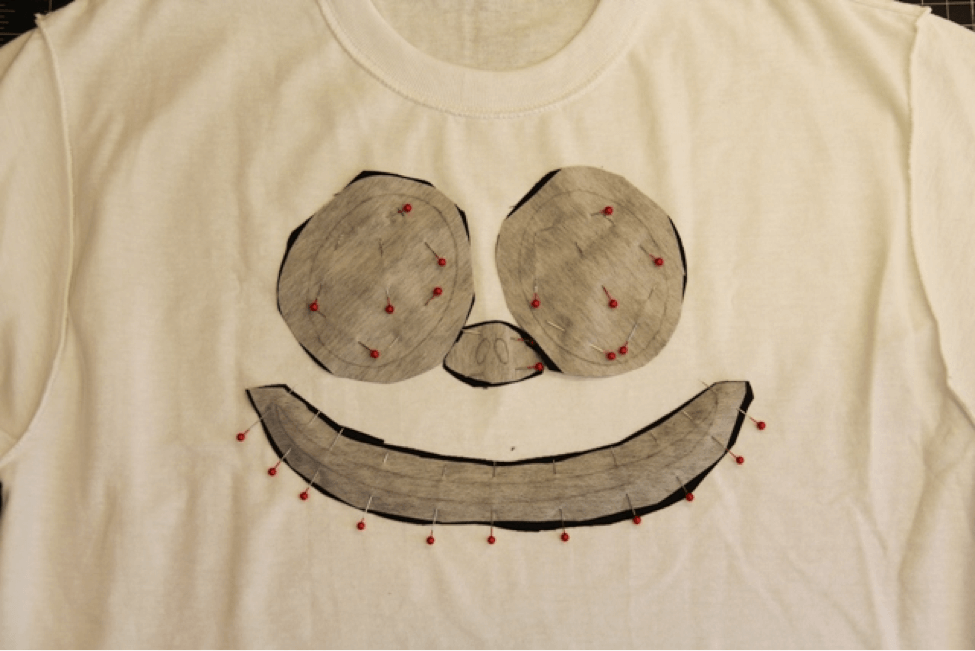
Using the white craft thread, stitch around each piece following the line. I used a backstitch. This takes a while. I'd recommend popping in your favorite Disney movie while you sew. Carefully trim away some of the excess black fabric, leaving at least 1/4" from the stitching.

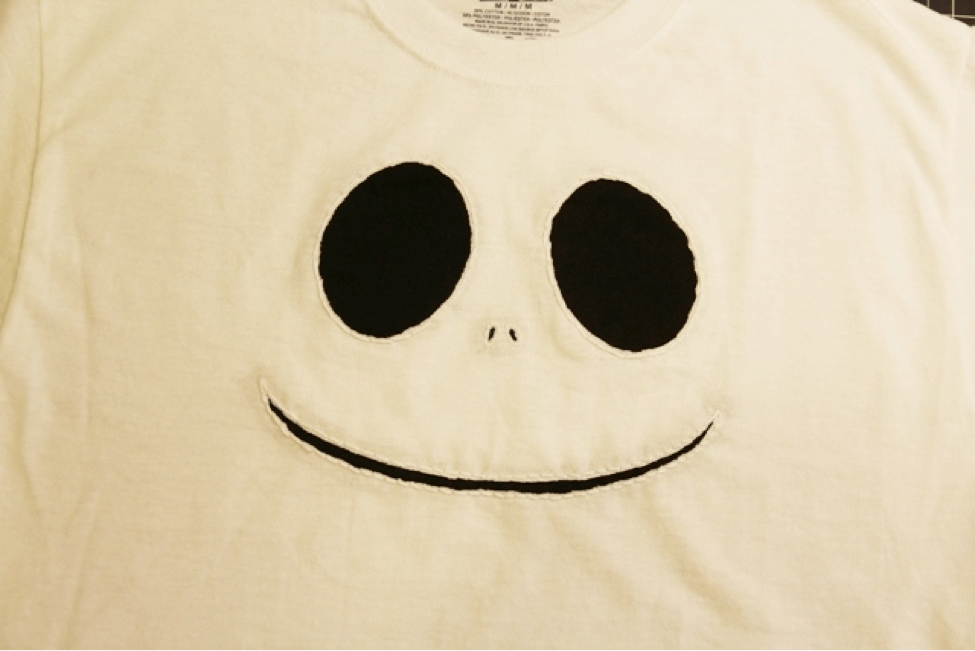
Turn the shirt right side out. Carefully snip only the shirt inside one eye. Using that as a starting point, cut out the shirt inside and stitching. Be very careful not to cut the black fabric or the craft thread.

Repeat with the other eye, the nose and the mouth. If you're concerned about cutting the tiny nose, you can cheat and color inside the stitching with a permanent marker.

To create the stitches over his mouth, thread your needle with the black craft thread. Knot one end. Start your first stitch up through the center of the mouth at one end, down about 1/4" above the top edge, back up about 1/4" below the bottom edge and down through the center where you started.

Repeat all the way across Jack's mouth at 1/4 - 3/8" intervals.

To make the Sally shirt, you'll need a light blue shirt, white fabric, red fabric, light blue craft thread, black craft thread, iron-on interfacing and two small black buttons.

Follow the same process you did with the Jack shirt to add Sally's eyes and mouth, using the white and red fabric. I used ombre craft thread, so you'll see variations in the color.

Slide the paper pattern inside the shirt and sketch the eyelashes, mouth and scar with a pencil. If necessary, pin the pattern in place and hold up to a window so you can see through the shirt. Iron interfacing behind the sketched areas to provide some stability for your stitching.
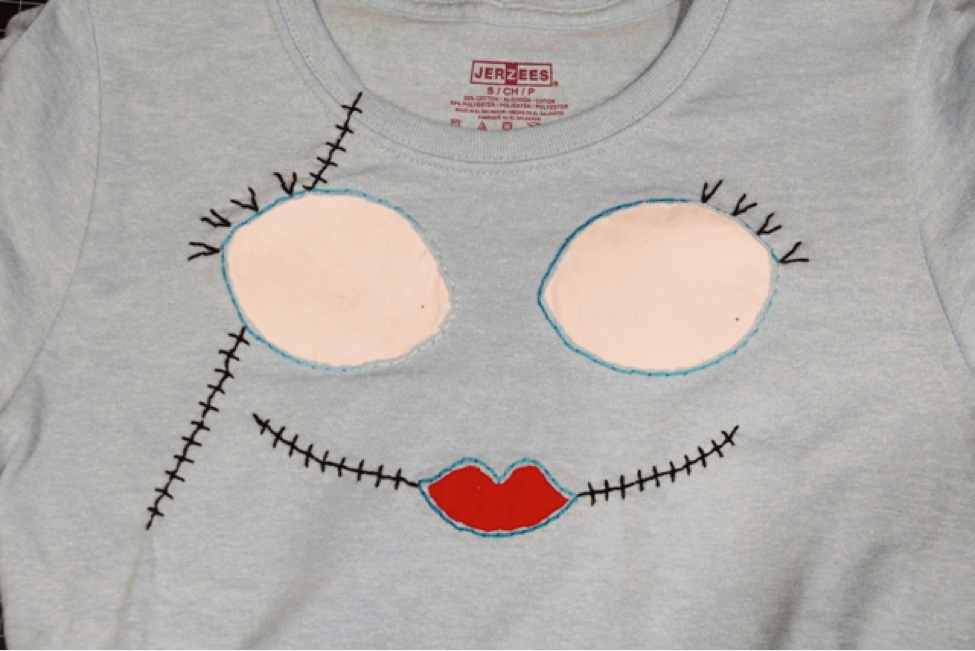
Stitch the eyelashes, mouth and scar as shown. Don't forget her blue nose, like I almost did. If you don't want to spend the time sewing the black areas on either of these shirts, you can draw them on with a permanent marker. Just be sure to test the marker in an inconspicuous place to make sure it isn't going to bleed.

Make small marks where you'd like the pupil to be, then sew the black buttons over the marks.

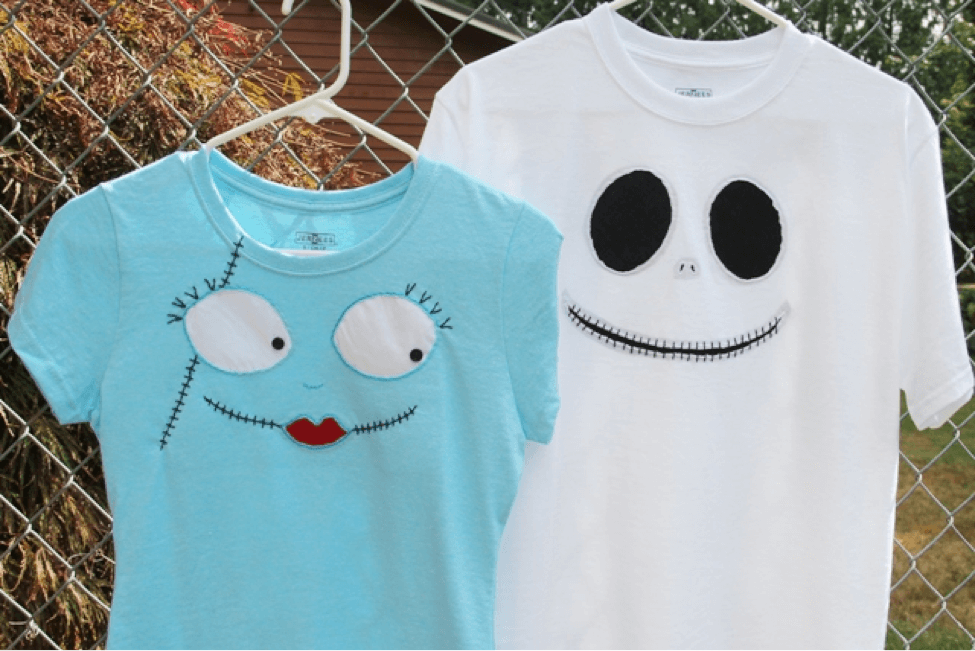
And Jack and Sally are ready to hit Mickey's Not-So-Scary Halloween Party!
Staci has been sewing and crafting for as long as she can remember. If there's a technique she hasn't tried, it's probably on her wish list. At her blog, Crafty Staci, she shares beginner-friendly craft and sewing tutorials, simple recipes and her successful, and sometimes not-so-successful, attempts at expressing her own creativity. In addition to her blog, you can find Staci at Facebook, Pinterest, Twitter and Instagram.
Related: Disney World Special Events for 2013
We hope a DIY craft will get you inspired for your upcoming Disney trip, help you remember your last visit to the parks or just add a little magic to your day. If you have a simple Disney project you would like to share, check out our guest blog submission guidelines.