We just returned from a big family trip to Disneyland. We had a few important events to celebrate, and where better than the Happiest Place on Earth? The day before we left, I found myself packed and ready to go with the entire evening still ahead of me. We were pretty eager to get going. Since it was either find something to do or go sit at the airport for 17 hours, I headed into my craft room. I came out with these Disney coffee cup sleeves as tribute to our favorite mousey sweethearts!
To make this pair of Mickey and Minnie coffee cup sleeves, you'll need:
- this pattern (PDF attached)
- cotton fabric (black, red, red dot)
- 6" of white elastic cord
- 2 large white buttons for Mickey
- 1 button for Minnie's bow
- 2 buttons, 1/2" - 1" for closure
- 5 1/2" of 1" wide ribbon
- InsulBrite (batting with metallic threads)
Cut two of the pieces marked "top" from the black fabric. Cut two pieces of the "back," also from black. Cut one each of the pieces marked bottom from the solid red and polka dot. Cut one piece of InsulBrite for each, using the "back" piece.
Bring the two ends of each piece of elastic together and tie with a piece of thread or stitch on a sewing machine to hold them in place and form a loop.
Sew the black top to the red bottom, making sure to keep the pieces oriented in the correct direction. You are sewing two curves together, so I've found the best way to do it is match the edges as you go. Be very careful not to stretch it at all.
Stitch the two ends of the ribbon together.
Start layering the pieces with the InsulBrite on the bottom. Lay the front of the sleeve on top. Center the elastic on the straight end on your right, as shown. The loop should face into the sleeve. Add your tag to the other end, if you use one.
Next, carefully lay the back piece on top with the right side of the fabric down. Pin everything in place. Stitch around 1/4" from the outer edge, leaving a couple of inches open at the bottom for turning. I also stitch several times over the elastic in the seam so it won't pop out.
Clip the corners and turn right side out. Press well with an iron, turning in the opening.
Stitch all the way around, close to the edge.
Move the seam to the back on the piece of ribbon. Wrap a piece of thread around the center and pull tight to gather it into a bow shape. Stitch it onto the center of the coffee sleeve, adding the button on top.
For the Mickey sleeve, sew the two white buttons about an inch apart near the center.
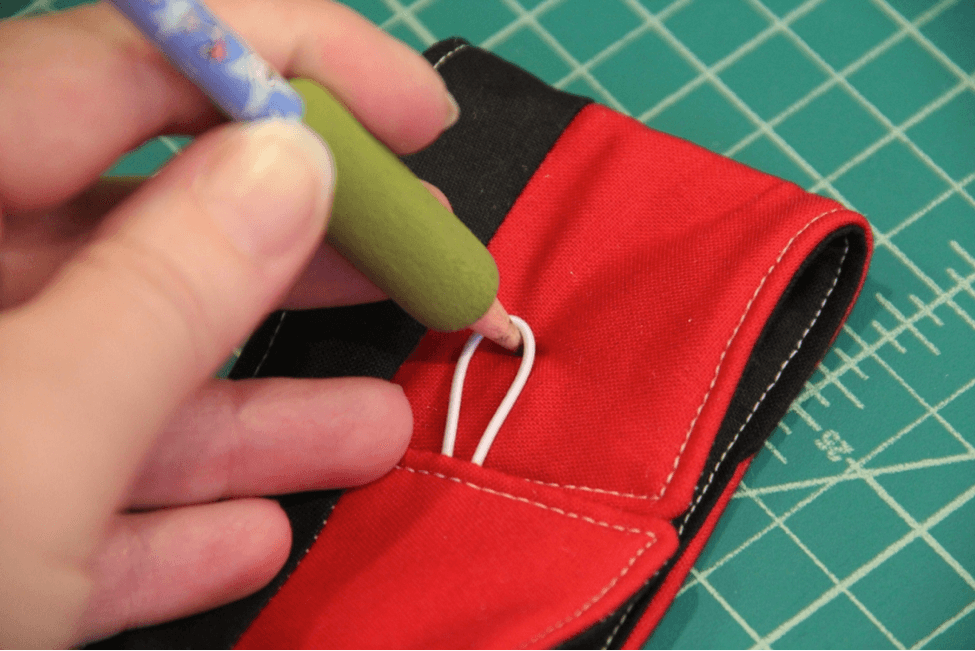
To determine where to sew the closure button, loop the sleeve around as if you were putting it on a cup. With the ends touching, mark the spot the elastic reaches without stretching. Sew the button on that spot.
The great thing about these sleeves is that they work equally well on hot or cold drinks. We used them every day we were in Disneyland!
Related: A Disney Saving Jar for Your Next Trip
Staci has been sewing and crafting for as long as she can remember. If there’s a technique she hasn’t tried, it’s probably on her wish list. At her blog, Crafty Staci, she shares beginner-friendly craft and sewing tutorials, simple recipes and her successful, and sometimes not-so-successful, attempts at expressing her own creativity. In addition to her blog, you can find Staci at Facebook, Pinterest, Twitter and Instagram.


Comments